Since accommodating resistance was introduced, many have used it to enhance their performance on the platform and the field of play. Many articles and research papers show how it can improve performance, but how are we using it to stay healthy? In my opinion, accommodating resistance is just as much a longevity tool as a performance enhancer. By utilizing different forms of accommodating resistance and smart planning, we can build and preserve our joints while getting stronger! To do so, we must know WHY, WHEN, and HOW to use it.
WHY Should You Use Accommodating Resistance?
it can become tricky to understand why you should use accommodating resistance. There are endless amounts of different training styles and systems to meet a vast amount of individual needs. Accommodating resistance should be there to ACCOMMODATE the individual and their program. Utilizing different
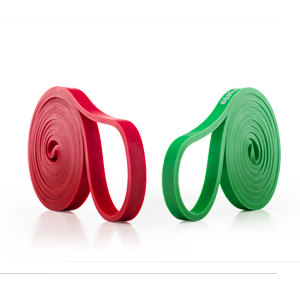
bands and
chains can help people address their specific weaknesses while also maintaining joint health.
We all know that when you utilize bands and chains, the resistance is heaviest at the top and becomes the lightest at the bottom. When you think about the main movements, such as Squat, Bench, and Deadlift, they often become the most unstable towards the bottom end range of the movement. If you are using chains and bands, you take a lot of pressure off the joint when it is the most vulnerable and continue moving it. This may help a lot of people train in pain or rehabbing with the lightened load at the bottom range of movement but continue to gain strength.
WHEN Should You Use Accommodating Resistance?
With the high variability of
band tensions and the number of chains you can use, it can be difficult even to understand where to begin. I will lay out some common problems that occur and show you when to use specific types of accommodating resistance.
- Your Lifts Feel Slow – If your one rep max (1RM) takes longer than five seconds to complete, you would probably benefit from using bands. Because they are elastic in nature, it forces you to push through with a lot more power. Technically, you could say the same thing with chains. However, bands change the velocity at which they apply a force, which then forces you to exceed that velocity to finish the lift. Ask many of the seasoned lifters how many people they have seen grind against a banded weight longer than 10 seconds on a single rep. The answer will be not many.
- Your Lifts Feel Unstable – If you shake a lot or have trouble bracing, chains would be a great way to improve your stability. Unlike the bands, the chains are just hanging on the bar. They can swing any which way and unload unevenly on the ground as you descend, making it challenging to keep your body and the weight stable.
- You Struggle at the Lockout – If you struggle at the lockout it simply means you are probably not strong enough for the weight you are attempting at the moment. Overloading your lifts can help your Central Nervous System train to adjust to that type of load by going above and beyond what you normally can do. With minimal load towards the bottom of the lift, you can use that energy to strengthen the top portion of the lift while it is overloaded with either bands or chains.
- Your Struggle at the Bottom – In this case, you probably should not be using accommodating resistance in the first place. This is the one area the bands and chains do not help with because the load is minimal. So, you should use straight weight and variations of pauses to help build your strength at the bottom of the lift instead.
- You Have Some Pain/Discomfort – You need to consult a professional while having pain. If they deem lifting weights safe, you can use Bands and Chains to help train around the pain. Depending on the type of pain and what causes it determines what you will use. I have worked with some clients where bands were extremely helpful because the tension felt constant through the lift. Other clients found chains were better because they completely unloaded the joint. Pain is difficult and should always be addressed by someone who has a lot of education and practical experience working with that type of population.
HOW Should We Use Accommodating Resistance?
We went over WHY and WHEN we would use accommodating resistance. Now, it is time to put our
bands and chains together to see how to use them! As I have said over and over again, this is highly individualized, so I will leave a few examples of how I would use them based on the problems addressed in the WHEN section. No matter your particular issue, there are a few things you keep in mind when implementing accommodating resistance.
Bands
- There should be tension in the
band throughout the entire movement. - Place them on the inside of the plates to prevent them from flipping while loading and unloading weights.
- Be clear of any tears to prevent them from snapping during the lift. I have done that one, and it does not feel good!
Chains
- They should be hanging off a leader chain so the weight is unloaded and loaded evenly in a fast fashion.
- There should always be at least two links of the chain when the lift is at lockout so they do not swing excessively.
- Place the outside of the plates to prevent hitting the bottom of the rack or bench
Both
- It should rarely exceed 30% of the total weight on the bar. Exceeding that frequently will diminish transferability to strength in that particular movement.
- The areas around the accommodating resistance should be clear to prevent from damage or stoppage of the accommodating resistance.
- Always start with an empty bar to get used to the accommodating resistance, especially if you have never used it before. It can feel extremely different and be difficult to judge jumps in weight from set to set.
Your Lifts Feel Slow
|
Monday Max Effort Upper Main Lift Bench Press Straight Bar -Working up to a 3RM within 6-8 Sets -Double Mini each side if 1RM Bench = 300 or less -Double Monster Mini each side if 1RM Bench = 300 or more |
Tuesday Dynamic Effort Lower Main Lift Speed Squats Straight Bar -Using 30% of 1RM for 8x2 -Light Band each side if1RM Squat = 400 or less -Average Band each side if 1RM Squat = 400 or more Speed Deadlift -Using 30% of 1RM for 8x2 -Double Mini Band each side |
Wednesday REST |
Thursday Dynamic Effort Upper Main Lift Speed Bench Straight Bar -Using 30% of 1RM for 8x3 -Double Mini Band each side = 300 or less -Monster Mini Band each side if 1RM Bench = 300 or more |
Friday Max Effort Lower Main Lift Back Squat Straight Bar -Working up to a 3RM within 6-8 Sets -Average Band each side if 1RM Squat = 400 or less -Heavy Band each side if 1RM Squat = 400 or more |
Your Lifts Feel Unstable
|
Monday Max Effort Upper Main Lift Bench Press Football Bar -Working up to a 5RM within 5-6 Sets -2 Chains each side if 1RM Bench = 300 or less -3 Chains each side if 1RM Bench = 300 or more |
Tuesday Dynamic Effort Lower Main Lift Speed Squats Safety Squat Bar -Using 30% of 1RM for 8x3 -2 Chains each side if1RM Squat = 400 or less -3 Chains each side if 1RM Squat = 400 or more Speed Deadlift -Using 40% of 1RM for 8x2 -Straight Weight -Comp Stance |
Wednesday REST |
Thursday Dynamic Effort Upper Main Lift Speed Bench Straight Bar -Using 30% of 1RM for 8x3 -1 Chain each side if1RM Bench = 300 or less -2 Chain each side if 1RM Bench = 300 or more |
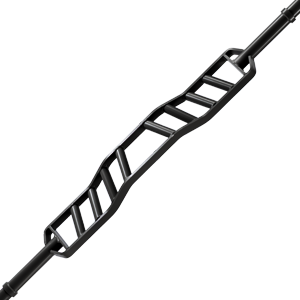
Friday Max Effort Lower Main Lift Back Squat Cambered Bar -Working up to a 5RM within 5-6 Sets -2 Chains each side if 1RM Squat = 400 or less -3 Chains each side if 1RM Squat = 400 or more |
You Struggle at the Lockout
|
Monday Max Effort Upper Main Lift Bench Press Straight Bar -Working up to a 3RM within 6-8 Sets -2 Chains each side if 1RM Bench = 300 or less -3 Chains each side if 1RM Bench = 300 or more |
Tuesday Dynamic Effort Lower Main Lift Speed Squats -Using 30% of 1RM for 8x2 -Light Band each side if 1RM Squat = 400 or less -Average Band each side if 1RM Squat = 400 or more Speed Deadlift Using 40% of 1RM for 8x2 -Straight Weight -Comp Stance |
Wednesday REST |
Thursday Dynamic Effort Upper Main Lift Speed Bench -Using 30% of 1RM for 8x3 -Straight Bar -1 Chain each side if 1RM Bench = 300 or less -2 Chain each side if 1RM Bench = 300 or more |
Friday Max Effort Lower Main Lift Back Squat Safety Bar -Working up to a 3RM within 6-8 Sets -Average Band each side if 1RM Squat = 400 or less -Heavy Band each side if 1RM Squat = 400 or more |
You Struggle at the Bottom
|
Monday Max Effort Upper Main Lift Bench Press Duffalo Bar -Working up to a 3RM within 6-8 Sets |
Tuesday Dynamic Effort Lower Main Lift Speed Squats -Using 40% of 1RM for 8x2 Speed Deadlift -Using 50% of 1RM for 8x2 -Straight Weight -Comp Stance |
Wednesday REST |
Thursday Dynamic Effort Upper Main Lift Speed Bench Straight Bar -Using 40% of 1RM for 8x3 -Slight Pause at the bottom each rep |
Friday Max Effort Lower Main Lift Pause Squat -Working up to a 3RM within 6-8 Sets |
Conclusion
Accommodating resistance is a great way to break through sticking points and accelerate your progress. It may also allow you to train around the pain you are having if implemented properly, but you should always seek a medical professional before doing so. However, just like using tools, you need to ensure you use the right one for the right job. Use the accommodating resistance that matches the problems that YOU are having.
Bio
Teddy helps clients achieve performance and wellness goals, working with athletes, first responders, and the general public, both in-person and online. Using the conjugate method, he builds injury resilience, enabling clients to pursue their passions. As the owner of Agoge Performance and a trainer at Ohio State Wexner Medical Center for Upper Arlington Fire Department, Teddy applies his athletic background to coaching. A former cornerback, pole vaulter, and powerlifter, he's now training to better understand the firefighters he coaches. He holds a BA in Exercise Science, an MS in Sport Performance, and certifications including NSCA-CSCS and Precision Nutrition Level 1. teddy.cox@agoge-performance.com

