The squat: the king of the big three, in my opinion. The bench press receives all the glory, much like Russell Crowe does in Gladiator (amazing movie, by the way, and in my top ten for sure), but nothing exhibits pure total body strength and tenacity like a heavy-ass squat.
There are many moving parts to a squat. I’m not going to dive into any of them, really. What I will get into is the one thing that I see missing in most squats: TORQUE!
Within the squat there are multiple joints that should be generating torque to move the bar efficiently in a way that exhibits the most power, speed, and strength. The big three are the hip (glute), knee/tibia (proximal), and ankle/tibia (distally). In part one of this article we will be discussing the hip (glute) as it pertains to creating torque in the squat.
What is torque?
Torque, as defined by Marion Webster’s dictionary is:
-
“A force that produces or tends to produce rotation or torsion; an automobile engine delivers torque to the drive shaft; a measure of the effectiveness of such a force that consists of the product of the force and the perpendicular distance from the line of action of the force to the axis of rotation.”
What should you take away from that dry explanation of torque? Torque is the ability of a force to cause rotation on a lever. The more you generate, the more control you have over your levers (leverages). Powerlifting is about moving weight from Point A to Point B. Gaining better leverages by being able to generate torque (at the appropriate places) allows us to better use muscle tissue instead of relying on joints, tendons, ligaments, and bone. Repetition of generating torque through training will allow you to create more power, increase intermuscular coordination, and decrease your risk for injury.
RECENT: Tools of the Trade — Popular Modalities for Soft Tissue Recovery and Therapy
Let’s take a quick look at some simple biomechanics to help us further illustrate this point, and then we will break down the squat so we can rebuild it with an emphasis on generating torque.
If we look at a basic biceps curl, most people perform this movement at a 90-degree angle. This is due to the angle-torque relationship. This simply states that generating the most torque will come when the angle of force is applied at 90 degrees. Move your arms farther away from you and the movement becomes harder and you decrease your ability to generate torque. However, this can sometimes be the objective. For example, in bodybuilding moving the biceps curl action out in front of you is more difficult and will make you work harder with less weight. You will generate less torque but still have the muscle under high tension due to the longer lever arm.
It is important to remember that joint range of motion is not indicative of the ability of a muscle, acting on joints, to create torque. The two things that are most relevant are the location of muscle insertion and its directional fibers. Actually, keeping an optimal (as short as necessary) range of motion and not going beyond is what will help create greater compressional forces and allow a joint or pattern to become more stable. Creating torque in a large range of motion leaves a lot of wear and tear. Think about baseball pitchers performing external/internal rotation when throwing 100 miles per hour. High force, high torque, large range of motion, and an average career of only five and a half years? Moving on.
Now, let’s break down the squat so we can see what most people are doing compared to what most people should be doing.
As you can see in the first video, there are a few things that stand out.
Even though my legs are abducted away from the midline of my torso, my joints are still centered over one another. My hip is in line with my knee, which is in line with my second toe. This puts me in a good position for hip extension and flexion in the sagittal plane. But we all know that power comes from where? You guessed it, kids: the transverse plane. When a squatting action is performed for thousands of repetitions and you’re not able to generate the needed torque (performed by the glute med) to help aid in external rotation of your femur (leg), your TFL becomes cranky. The TFL also helps to stabilize the pelvis, but when it becomes short and inhibited it can cause other imbalances.
Now, let’s look at how we modified this squat and see its ending position.
Now what did you notice?
You should have noticed a change in tibial position along with a change in femur position. This was generated by the glute med and many deep glute external rotators. This action should be focused on both the eccentric and concentric portions of the squat. You might notice a few things happen when you first try this. One might be a loss of depth. This is because the new demands of torque create a “lack of slack” (yes, I just made that up) of the fascia and surrounding tissues. This leads to better stability of the joints and levers. Two, if you find yourself leaning forward more to compensate, you might be lacking movement in either head of the biceps femoris, also partly responsible for tibial rotation. Restricted hamstring movement will cause you to move elsewhere, most often at the lumbar.
Now, what should you do if you cannot cue this correction into action? Here is an exercise I use with my patients to teach rotation of the femur and tibia. Give it a try.
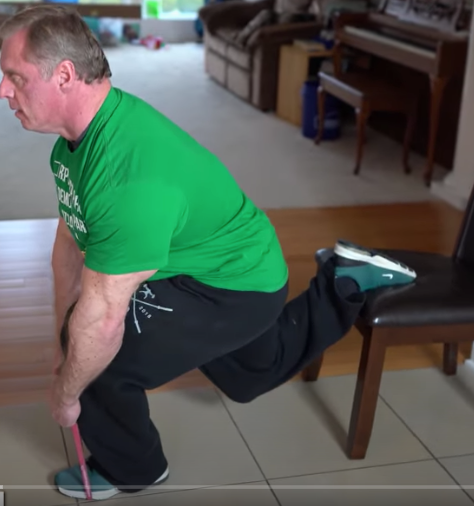
Once you understand and coordinate your muscles to create torque, you then want to be able to introduce this into a squat pattern. I have found that a front-foot elevated (FEE) split squat does a great job of loading the correct pattern — but not to a point that inhibits good technique. Again, the goal is to be able to reproduce this action continuously for greater intermuscular coordination. Gradual loading should be performed via the squat or corresponding squat movements. See the video below.
Lastly, we want to start slowly loading the squat. We want to do this with a mechanical advantage (leverage and center of gravity) so we can concentrate on torque and not balance or position. I use an extended goblet squat exercise. See video below.
As you begin to become more confident with creating torque, begin moving the kettlebell closer, changing your leverages and challenging your position. This might be difficult at first and may require some additional stability or mobility elsewhere. Once you are proficient with the kettlebell or weight, begin your barbell squat movement.
To sum up: The glutes, mainly the deep six gluteal rotators, are responsible for the position and stability of the femur. This correlates to shin position and foot position, as they are all connected. If you are squatting in a linear fashion with all the joints operating in the same plane of force, overuse of certain tissues can and will occur. You also limit your potential strength and power output by not being able to produce torque and maximal force. If you are looking to take your squat to the next level and can’t pinpoint what might be holding you back, take a step back and really address torque.

