Deadlifting is one of those lifts that becomes more than a little frustrating, especially when you hit lulls and plateaus in your training. The key is to continually find ways to train the principle without actually pulling them all from the floor. This part may be easier for the assisted lifter because of the spring effect of a well-fitting pair of briefs and/or “super suit.” (I just wanted to say “super suit” because I personally hate that term. It’s usually coined by people who choose to lift raw for whatever reason. These people generally choose to speak harshly about those who choose to lift assisted. However, this is of no consequence to me because I personally enjoy it all and find it fulfilling. I truly wish that everyone could just get along. Sorry for the tangent rant.)
The goal of this article is to give you, the reader, some of the training tips that have worked for me. This information has been beneficial to the athletes’ I’ve coached on a regular basis, the lifters I’ve trained online, and the lifters I’ve helped at meets and in other gyms. Sometimes my pointers have increased their PRs by 20–30 lbs. I hope they do the same for you.
As a rule of thumb, I choose to do a deadlift movement three out of every four weeks. It’s important to recognize that pulling from the floor should only be done approximately one out of every six weeks. Below is a list of the max effort lifts that I recommend on your deadlift days:
- Deadlift with plates sitting on two-inch boxes. Chains may be draped over the bar for accommodated resistance.
- Deadlift with plates sitting on four-inch boxes
- Deadlift with plates sitting on six-inch boxes.
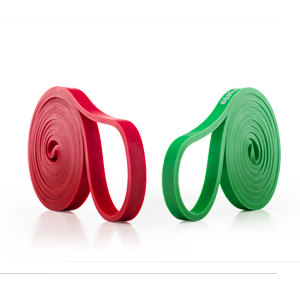
- Reverse band deadlift with average or light bands. This may be done sometimes with chains draped over the center of the bar. (I use average bands due to my strength level, which I’ll explain later.)
- Perform Zercher squats from varying pin heights or suspended from chains. If you are flexible enough, these may be done from the floor.
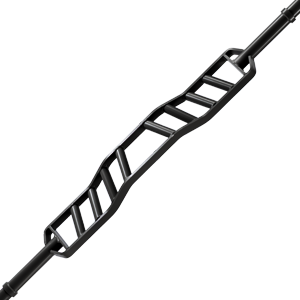
- Perform cambered bar close stance squats to two inches above parallel. These may be done as a free squat, to a box, or to a chain suspended height.
- Perform opposite stance deadlifts. This is a great way to train some lagging muscles while avoiding overtraining the ones that you use for your competition stance deadlifts. Occasionally, I do alternating stance sets (i.e. set of conventional followed by a set of sumo, always doing my opposite stance first).
- Every third week, I perform speed squats with or without accommodated resistance followed by speed deadlifts. When I speed deadlift, I wear a little looser fitting brief than when in competition. This allows me to build extra strength to reach the bar with submaximal weight loaded on the bar.
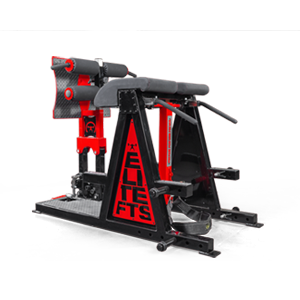
- Glute ham raise (especially one leg at a time)
- Reverse hypers (God bless Louie Simmons)
- Kettlebell swings between the legs using two bells and reaching as far back as possible. Use your hips and hams to do the work and snap the hips at completion.
- Good mornings of all kinds. Personally, I like the seated ones using the cambered bar with your feet wide and out in front of you. I do 5s and 8s on good mornings.
- Band leg curls while lying over a pommel horse, preacher curl, or glute ham raise machine.
- Grip work of all kinds
- EFS stone trainer. There is no substitute for this exercise except for the stones themselves.
- Back raises. These are much harder than they look and really hammer the erectors.
- Some type of side bend or suitcase deadlifts
Building a good deadlift program requires creating a template for the next “X” number of weeks and realizing that it is subject to change based on the emergence of weaknesses, the onset of overtraining, and sometimes the “God awful injury.” The main thing is to learn to recognize your weaknesses and adapt to fix them. Don’t be afraid to say that you’re overtrained and then adjust. Keep in mind that this is a marathon, not a sprint. We all have egos, but we must not let them impede our progress.
Ok, here is a sample 12-week program for someone who does all three principles. I’m only including the deadlift day, and this should follow the Westside-style speed phase for a minimum of four weeks.
Week one:
Zercher squats from low pin with chain weight to accommodate resistance
Kettlebell swings, 3–4 sets of 8–10 reps
Stone trainer, 3–5 sets of 3–5 reps
Reverse hyper, 2–4 sets of 10–12
Abs, 3–5 sets (all ab work should be done with weights, bands, or chain resistance)
Grip work
Week two:
Cambered close stance squat to suspended chains two inches above parallel to a 3RM
Kettlebell swings, 3–4 sets of 5–10 reps
Stone trainer, 3–5 sets of 3–5 reps
Reverse hyper, 2–4 sets of 10–12 reps
Suitcase deadlifts, 3–4 sets of eight reps with each side
Grip work
Week three:
Speed squats (light briefs) with chains added for six sets of two reps to a parallel box after a good warm up
Speed deadlifts (light briefs) with chains for six singles with 50–60% of your suited max after warming up with triples
Band leg curls, four sets of 6–10, one leg at a time
Seated good mornings, five sets of 5–10
Abs, 3–5 sets
Grip work
Week four:
Deadlifts off four-inch platforms with chains draped over the center and/or ends of the bar wearing tight briefs to a max single and taking slow jumps to increase sets. The last 3–5 sets should be singles.
Glute ham raises, one leg at a time, preferably with band resistance. Remember to look down on these reps. Trust me.
Reverse hypers, 3–5 sets of 8–12 reps
Kettlebell swings, two sets of 12 reps
Side bends, 3–5 sets of 6–10 reps
Abs, 3–5 sets
Week five:
Reverse bands—if your max is less than 600, I suggest using a light band or a light and a mini band. If your max is over 600, use an average band.
Start in briefs and finish with your suit on and the straps down for the last rep. Use a rep scheme like 5, 3, 3, 3, 1, 1, 1, taking small incremental jumps.
Band leg curls, as in week three
Stone trainer, 3–5 sets of 3–5 reps
Suitcase deadlifts, 3–5 sets 6–10 reps each side
Abs, 3–5 sets
Grip work
Week six:
Speed squat (loose briefs) with bands to accommodate resistance, 4–6 sets of two after a good warm up
Speed deadlifts (loose briefs) with bands, four singles (more band tension than bar weight and let your speed denote the weight) after doing a good thorough warm up with the bands on the bar
Back raises with chains added for 4–6 sets of 5–8 reps. I like to do these by starting in a rounded position and finishing in an arched position.
Kettlebell swings, 3–5 sets of 8–12 reps
Abs, 3–5 sets
Glute ham raise, two sets of 12 reps
Week seven:
Deadlifts off two-inch platforms with chains draped over the center and/or ends of the bar. Start in briefs and finish in full gear with the straps up. Use a rep scheme such as 5, 3, 3, 3, 1, 1, 1, 1 (this is just an example)
Seated good mornings, 4–6 sets of 5–10 reps
Glute ham raise, one leg at a time with band tension
Side bends, 3–5 sets of 6–12 reps each side
Abs, 3–5 sets
Grip work
Week eight:
Opposite stance deadlifts, raw or with loose briefs working up to a 3RM
Back raises with chains draped over the bar, 4–6 sets of five reps
Kettlebell swings, 4–5 sets of 8–12 reps
Abs, 3–5 sets
Grip work
Week nine:
Reverse band deadlifts starting with competition briefs and progressing to the suit with the straps down. Finish with the straps up using a rep scheme like 5, 3, 3, 3, 1, 1, 1, 1
Band leg curls, four sets of 6–10 reps, one leg at a time
Reverse hyper, two sets of 12
Suitcase deadlifts, 3–5 sets 6–10 reps each side
Abs, 3–5 sets
Grip work
Week ten:
Speed squats (loose briefs), 4–6 sets of two with chains added after a thorough warm up
Speed deadlifts (loose briefs), four singles with chains draped after a good warm up
Stone trainer, 3–5 sets of 3–5 reps
Glute ham raise with added band tension, 4–5 sets 6–10 reps each leg
Abs
Grip work
Week eleven:
Deadlifts off six-inch platforms in competition briefs only with chains draped over the bar working up to a 3RM
Seated good mornings, four sets of eight reps
Reverse hyper, four sets of 12 reps
Side bends, 3–5 sets of 6–10 reps each side
Abs, 3–5 sets
Week twelve:
Speed deadlifts in loose briefs for six singles with no accommodated resistance at 50–60% of your contest max.
Reverse hypers, four sets of 12 reps
Kettlebell swings, two sets of 12 reps
Abs, 3–5 sets
Week thirteen:
Contest PRs
Now for the technical end of the deadlift…this is a lot of trial and error as well as analyzing video to find technical flaws in your form. We all have them and the sooner you find these flaws, the sooner you can move forward and reduce the inherent risk of injury.
- Your briefs and suit should be tight fitting first in the hips and somewhat in the leg openings. If your federation allows it, you will want to have adjustable straps. If adjustable straps aren’t allowed, slide the straps up or down on the traps and shoulders to help regulate the tension of the suit.
- Your briefs and suit should be worked up as far into your crotch as possible. You will probably need the Metal suit slippers to aid in getting the suit and briefs all the way up. Be sure to work them up the legs by bending side to side and pulling them up. You may also put your foot up on a bench and lean forward. Put your straps up and adjust them as tight as possible. This only applies if you have Velcro straps. If not, you may be wondering what I’m talking about. To aid in getting the suit up as far as possible, you may need to sit down and back, bouncing up and down as if performing a squat. Use the bar to pull yourself into proper deadlift position, flaring the knees wide to ensure they are up as far as possible. At this point, you can adjust the straps to the tightness you desire for your lifts. You may even mark your straps with a permanent marker as a reference point for more accurate and rapid adjustment.
- If there is any way possible, use an overhand hook grip. So far I can’t work this out. I have large palms but short fingers. This grip provides better leverage by keeping the bar closer to your shins, and it allows you to more easily pull yourself into position without adding undo stress to the previously underhand grip shoulder. It will benefit you now and in the future if you train yourself to put your hands fully over the knurling. As you get heavier in poundage, you will need the additional friction.
- Approach the bar and put your feet out at a 40- to 50-degree angle. I prefer closer to 50 with my legs centered on the marks. This works best for me with my lower leg perpendicular in all directions at the bottom of the lift. At this point, I slide my feet under the bar really tight. You will want to stretch upward, take a small amount of air in your gut, and then bend at the waist to grab the bar. Make sure you get it good and then finish filling your belly full of air, flare your knees, and use the counterbalance of the weight to allow you to pull your ass down to the bottom position. While continually pushing your knees out hard, pull yourself down and in. Arch, arch, arch to get your lower and upper back in the best leverage position. Your head and chest up should be up and your shoulder blades must be retracted back and tight. Make sure to have the bar against your shins. When you hit this point, jam your hips forward and under the bar while throwing your head back and forcing your feet out and down, as if you were spreading the floor. Drive your head back throughout the lift. Continue spreading the floor, driving the hips forward, and pulling up and into the completion of the lift.
- Knowing how your suit works will allow you to understand how to use it to your advantage. The Metal Sumo King Deadlifter is by far the best sumo suit on the market. It is double ply in the back and single ply in the front. The straps are tight but stretchy, allowing for great pop out of the hole. The cut of the suit bottom as well as the angle of the crotch will allow you to get your knees out so you will be closer to the bar. That’s where you need to be for leverage. The double ply rear gives you extra tension as you push back and load the spring to drive your hips forward. As you keep pulling, the suit throws your hips forward all the way to lockout. The single ply front is less cumbersome and aids in getting down and allowing those knees to track out. It also allows you to get your shoulders back. The Ace briefs are a perfect companion. They’re designed to push your knees out and throw your hips forward. They still allow you to sit back because of the way the front and back materials are cut. Using the suit and briefs together will allow for a synergy type effect. If I weren’t sponsored by Metal, I would still use this combo because it is simply the best.

