

The Progressive Range of Motion Method: How to Break Your Ceiling Without Adding a Pound to the Bar
A training method built on Paul Anderson's original overload principles that lets advanced lifters break through strength plateaus by systematically raising neurological force output.
Paul Anderson did not have a power rack.
He had a barn, a barbell, chains, and a shovel. When he wanted to squat heavier, he hung the bar from chains attached to the barn rafters and started from the top. Every week, he let those chains out a link at a time, lowering the starting position until he was eventually squatting out of the hole. When he wanted to deadlift heavier, he dug a hole in his garden, stood in it, and pulled. Then he shoveled dirt back in, week by week, until he was pulling from the floor.
This is the origin of the Progressive Range of Motion method. The man who invented it built it with dirt, chain, and the understanding that overloading the nervous system does not always mean adding weight to the bar.
Fifty years later, most lifters still have not figured that out.
The Method, Plain and Simple
Take a weight at or slightly above your current one-rep max. Perform work with it, starting from a short range of motion. Each session, increase the range. The load stays the same. The range changes. By the time you reach full range, your nervous system has adapted to that weight across all positions.
What the Progressive Range of Motion Method Actually Is
The concept is simple, which is probably why people keep misapplying it.
You take a weight at or slightly above your current one-rep max and perform work with it, starting from a short range of motion. Over the course of your training cycle, you progressively increase the range of motion until you are performing the full lift. The load does not change. The range does.
For the squat, that means box squats starting high, dropping one increment per session or every other session. For the bench, it means board presses, working down from a five-board to a one-board and eventually to chest. For the deadlift, it means block or pin pulls, starting with the bar elevated and stepping down toward the floor.
The method goes by a second name you may have seen: the neurological carryover method. That name tells you exactly what it is doing and why it works. This is not a method for building muscle. If size is your priority right now, look elsewhere. This is a method for rewiring your nervous system to express force you already possess but cannot yet access on demand.
Most advanced lifters are not weak. They are neurologically limited. There is a ceiling on how much force your body will allow you to produce, and the goal of this method is to systematically raise that ceiling by teaching your body that nothing bad happens when you move heavy weight.
Who It Is For
This is not an intermediate method. It requires a solid technical base across all three lifts, genuine comfort under near-maximal loads, and the psychological composure to get under a supramaximal weight multiple times per week without having to rev yourself into a frenzy on every single set.
That last point matters more than most people realize. If you need to psyche yourself up to the point of exhaustion just to unrack the weight, you will burn out before the training cycle produces results. The neurological and psychological demand of this method is already high. You do not need to add unnecessary stress on top of it.
If you are a lifter who has been handling heavy weights for years, does not crumble technically when loads get uncomfortable, and has hit a wall that more volume and more intensity have not cracked, this method was built for you.
If you are still sorting out your squat technique or have never handled anything close to a max load, go build that base first. Come back to this later.
Why It Works: Five Things Happening Under the Bar
1. Golgi Tendon Organ Desensitization
Your body has internal brakes. The Golgi tendon organs sit at the junction of muscle and tendon and exist to prevent you from producing so much force that you tear tissue off bone. For most untrained people, these organs kick in at somewhere around 30 to 40 percent of actual force capacity. Advanced athletes push that toward 80 to 90 percent.
Heavy training desensitizes these brakes over time. The PRM method accelerates that process by repeatedly exposing your body to near-maximal and supramaximal loads, demonstrating session after session that producing this level of force does not result in catastrophic injury. Over time, the nervous system relaxes its grip.
Adrenaline does the same thing, which is why you hear stories about people lifting cars off children. The problem with relying on adrenaline is that you cannot control it, and you cannot train with it consistently without wrecking your recovery. Systematic overload is the sustainable version.
2. High-Threshold Motor Unit Recruitment
Once you get above roughly 80 percent of your one-rep max, you have recruited all available motor units. Getting stronger at that point is not about recruiting more fibers. It is about increasing the rate at which those fibers fire.
This is called rate coding. The goal is to train your nervous system to fire everything at once, instantly, when you need it. The PRM method generates that stimulus reliably and repeatedly because you are working at or above your max every session.
3. Tendon Development
Muscle gets most of the attention. Tendons do most of the limiting.
At the advanced level, the tendons are often what is holding the lift back. Thicker, stronger tendons funnel more of the force your muscles produce into the bar. They also protect you from injury under loads that would otherwise snap something.
The challenge with tendon development is that tendons require very high loads to respond, but very high loads are also brutally taxing. Doing heavy volume at 95-plus percent is not sustainable over a full training cycle. The PRM method solves this by letting you accumulate significant volume at supramaximal loads during the short-range portions, where recovery demand is manageable. You get the tendon stimulus without the crushing fatigue.
4. Postural and Bracing Strength
Spending multiple sets under a weight heavier than your max forces your upper back, abs, and core to adapt in ways that standard training does not always reach. You cannot hold that load without getting stronger at holding it. Equipped lifters in particular know this: controlling supramaximal weight is half the battle. This method builds that capability directly.
5. Confidence Under Heavy Loads
This one gets underestimated. The brain has memory. If you have never had 550 pounds on your back before meet day, part of your head is going to notice that, and some of your focus will go toward managing anxiety instead of executing the lift.
When you have had that weight on your back for eight weeks in a row at progressively longer ranges of motion, walk-out day feels like coming home. You are not experiencing the load for the first time. You are performing a task you have already done many times. That shifts everything.
How to Set It Up
The Load
Pick a weight between 100 and 103 percent of your current one-rep max. Not 105. Not 110. The instinct is to go heavier, but greed is exactly what makes this method fail. Too much load triggers the same Golgi tendon organs you are trying to desensitize. You end up inhibiting force output rather than increasing it.
If you are too conservative with the load, the worst case is that you hit it for a double instead of a single at the end of the cycle. That is not a problem. If you are too aggressive, you stall out before the cycle finishes.
Sets and Reps
Two to three sets of as many technically clean reps as possible. In the early weeks at the shortest range of motion, if you are not hitting 15 to 20 reps, you either started too heavy or your technique is not ready for this method. Those numbers will drop as the range increases.
Through the first half to two-thirds of the cycle, favor three sets. As the range of motion approaches full and recovery demand increases, drop to two.
Duration
The minimum is six sessions including the final test day: five board, four board, three board, two board, one board, full range. That is a functional cycle if the load is right.
The best results tend to come from 8 to 10 sessions. More sessions mean a smoother, more gradual progression and more time at each range to accumulate the stimulus.
Frequency
For most advanced lifters, running the PRM work every other week on each lift makes sense. One week you run it on the squat and bench. The next week you run it on the deadlift. Alternate back and forth. This manages neurological demand while keeping some full-range work in your program.
If your training loads are not extremely high or your recovery is exceptional, you may be able to run it every week on all three. Equipped lifters at very heavy weights may need to drop frequency further, down to once a month per lift. Same principle, different frequency based on the demand.
The Number That Kills This Method
People get greedy with the load. They pick 108 or 110 percent because they want a bigger PR at the end. Then they stall out in week four and wonder what happened. Too much load activates the Golgi tendon organs instead of desensitizing them. The result is inhibition, not adaptation. Stay at 100 to 103 percent. Let the method do its job.
The Three Lifts and Where People Go Wrong
Squat
The most common error is rocking back onto the box. There is a time and a place for a hard Westside-style rock and sit, but the PRM method is not it. The goal is carryover to the full lift. That means squatting straight down to the box, keeping the bar over your midfoot, maintaining tension, and driving straight back up.
Set up a camera from the side and watch the bar path. If it drifts behind your midfoot when you hit the box, you are sitting into a position you will never be in during a free squat. You are training a different motor pattern. The carryover disappears.
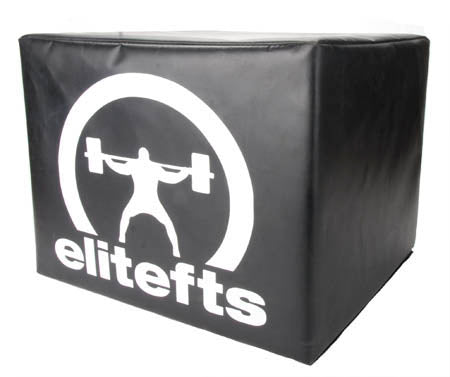
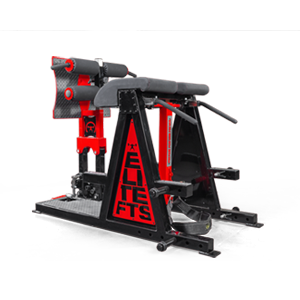
Think of the box as a depth gauge, not a resting point. Put about half your weight on it, keep everything tight, and drive back up. The elitefts Box Squat Box adjusts from 11 to 16 inches and is built to handle maximal loads, which is exactly the kind of box you need when the weights are above your max.
Bench
The failure mode on board press within this method is allowing the bar to sink too far into the board, which lets the elbows flare and the upper back go slack. That is not a board press. That is a lazy partial that trains you to fold at exactly the moment you need to be tightest.
The elbows need to stay stacked under the wrists. The upper back needs to stay tight through the touch. When you drive off the board, everything should look like it does when you press off your chest. If it does not, the carryover will not be there when it counts.
Fifty percent of the weight touches the board. Everything else stays loaded and tight. The full progression works from a five-board down through a one-board, with the two, three, and five-board covering every increment in between. All solid yellow pine, built to hold up under whatever you are pressing.
Deadlift
The error here is hitching, letting the knees sneak under the bar to squat the weight up. In powerlifting, this gets you red-lighted. More importantly, it means you are not training the movement you need to get stronger at.
The top half of the deadlift is posterior chain dominant. Shins nearly vertical. Hips driving through. Almost entirely hamstrings and glutes. That is what you need to strengthen. If you let the knees come forward and turn it into a squat movement, you are not building what the full lift needs.
It should feel like a very heavy stiff-leg deadlift. Because functionally, it is.
The Bottom Half Problem
For most of a PRM cycle, especially in the early weeks, you are not training the bottom of the lift. You are getting stronger from the top down. If you do nothing to address that, when the cycle finally comes around to full range, your bottom position is going to be the weak link.
Two solutions. Option one: alternate the PRM work with full-range speed or technique work on the same lift. One week PRM on the squat, the next week full-range squats. This keeps the bottom position trained throughout the cycle.
Option two: keep targeted assistance work for the bottom position on every training day. For the squat, that might be narrow-stance paused squats, front squats, or heel-elevated squats. Something that loads the bottom range more directly. It does not need to be heavy. It just needs to keep that position from regressing.
The Tools for This Cycle
The PRM method requires equipment that can hold up to loads above your max. The elitefts Box Squat Box adjusts from 11 to 16 inches and is built to handle whatever you put on it. The full board press lineup gives you every increment you need from the five-board down to one. Use the right tools. Run the method clean.
The Action
If you are an advanced lifter who has been stuck on the same numbers for more than a training cycle or two, the PRM method is worth a serious look. The principles are sound. The history backs it up. Paul Anderson was not accidentally strong.
Pick a load between 100 and 103 percent of your max. Start at your shortest partial range. Run 2 to 3 sets of clean AMRAP each session. Drop the range incrementally across 8 to 10 sessions. Keep your technique honest. Film every set. Maintain the same bar path and positions you would use in the full lift, or the carryover is gone.
The method does not work because you got to practice with heavy weight. It works because you changed how your nervous system responds to heavy weight.
That is a different kind of strong. And it is the kind that actually shows up on the platform.
Live, Learn, Pass On.