

Weight Training Progressions: A Simple 3-Step Guide to Smarter Programming
By Ashley Jones
I have tried over my career to simplify the programming process and to educate each group on how they can take control of their own narrative in relation to their specific needs, goals, and training age. Designing an effective weight training program doesn’t need to be complicated. In fact, the most sustainable and successful approaches are often the simplest. Over years of coaching, a clear three-step framework has emerged that allows anyone—from beginners to experienced lifters—to build, adjust, and take ownership of their training.
Build a program that matches your equipment, schedule, training age, and goal — without getting buried in complexity. The best plan is the one you can execute, repeat, and progress.
The 3-Step Framework
This method focuses on clarity, flexibility, and long-term progress, helping individuals stay consistent while avoiding accommodation to training.
Step 1: Select and Categorize Your Exercises
The foundation of any program starts with understanding what you can actually do. Your available equipment will determine your exercise options, so begin by identifying what’s accessible—whether that’s a full gym, a home setup, or minimal gear.
From there, organize your exercises into movement categories, such as:
- Push (e.g., bench press, shoulder press)
- Pull (e.g., rows, pull-ups)
- Squat (e.g., back squat, goblet squat)
- Hinge (e.g., deadlifts, hip thrusts)
- Core and carry movements
This structure ensures balanced development across the Body and prevents overemphasis on certain muscle groups while neglecting others.
Step 2: Align Training With Your Lifestyle
A great program only works if you can stick to it. That’s why your schedule matters just as much as your exercise selection. Consider your weekly commitments—work, school, family—and determine how many days you can realistically train.
An important concept here is the “minimum effective dose.” This refers to the smallest amount of training needed to maintain or progress your fitness. Having a backup plan with shorter, essential workouts ensures you stay consistent during busy periods.
Think of these as your non-negotiables—sessions you can rely on even when life gets hectic. I have also included a range of example programs to provide you with real-world examples.
Step 3: Choose Sets, Reps, and Progression Strategy
Once your exercises and schedule are set, the next step is deciding how to train them. Your choice of sets and repetitions should reflect your primary goal:
- Strength: lower reps, heavier weight
- Muscle growth (hypertrophy): moderate reps and volume
- Endurance: higher reps, lighter loads
It’s also important to consider your training age (experience level) and available time. Beginners may progress quickly with simple structures, while advanced lifters need more variation and planning.
A practical approach is to organize training into a three-week cycle, gradually adjusting intensity or volume to drive progress while avoiding stagnation.
The Big Picture: Keep It Simple and Adaptable
This three-step system is designed to remove confusion and give you control over your training. By focusing on:
- Smart exercise selection
- Realistic scheduling
- Goal-specific programming
You create a routine that evolves with your needs. The key is not perfection, but consistency and adaptability. When your program fits your life and goals, progress becomes far more sustainable.
Step One: Movement Foundations (Exercises & Categories)
When it comes to designing an effective training program, the goal isn’t to chase random exercises—it’s to build around fundamental human movement patterns. This approach not only improves performance but also reduces injury risk and creates a more balanced, resilient body.
Every well-structured program should include a combination of these foundational patterns, layered with mobility and stability work to support long-term progress.
The Full-Body Approach: Simple, Efficient, Effective
Full-body training is one of the most efficient ways to train, especially for those with limited time or those looking to build a strong base.
The Big 3 is the most stripped-down version, focusing on the essentials:
- A push movement to develop pressing strength
- A pull movement to build the upper back
- A squat pattern for lower-body strength
This is where many beginners should start—simple, repeatable, and effective.
The Big 4 expands on this by introducing the hinge pattern:
- Squat
- Hinge (like deadlifts or hip hinges)
- Upper-body Push
- Upper-body Pull
This addition is critical. The hinge trains the posterior chain—glutes, hamstrings, and lower back—which is often underdeveloped but essential for both performance and injury prevention.
The Big 5 takes it a step further:
- Squat
- Hinge
- Push
- Pull
- Loaded carry
Loaded carries (like farmer’s walks) are often overlooked, but they build real-world strength, grip, and core stability in a way few other exercises can.
- If your goal is to move well, get stronger, and build durability, this is one of the most complete frameworks you can follow.
The Upper/Lower Split: More Volume, More Precision
For those training more frequently, an upper/lower split allows for greater volume and more targeted development.
Upper body training should include:
- Horizontal push and pull (bench press, rows)
- Vertical push and pull (overhead press, pull-ups)
- Angled or rotational movements to fill in gaps and support joint health
Lower body training should cover:
- Squat patterns for quad strength
- Hinge patterns for posterior chain development
- Unilateral work (lunges, split squats) to address imbalances
- Direct hamstring and glute work to reinforce stability and power
This structure allows you to train harder while managing fatigue more effectively across the week.
Putting It Into Practice
The key isn’t choosing the “best” system—it’s choosing the one that fits your schedule, experience level, and goals.
- If you’re new or short on time: stick with full-body training
- If you’re more experienced or training 4+ days/week: consider a split
- Regardless of structure: prioritize consistency, good movement quality, and gradual progression
A well-built program doesn’t need to be complicated—it just needs to be intentional.
Step Two: Training Frequency, Choosing the Right Weekly Structure
The effectiveness of any program isn’t just about exercise selection—it’s about how often you train and how that training is distributed across the week. The goal is simple: match training frequency to the athlete’s experience, schedule, and recovery capacity.
2 Days Per Week: Minimum Effective Dose
For those with limited time, a two-day full-body approach delivers results without unnecessary complexity.
Training alternates across sessions to ensure balanced development:
Week 1: Workout A (Mon), Workout B (Thu)
Week 2: Workout C (Mon), Workout A (Thu)
Each session includes:
- Squat pattern
- Hinge pattern
Upper Push
Upper Pull
Exercise selection rotates (e.g., front squat → Bulgarian split squat → back squat), allowing variation without losing structure.
This approach works because it prioritizes consistency over volume—doing enough, done well.
3 Days Per Week: The Performance Sweet Spot
Three full-body sessions per week is where training starts to become more athletic and adaptable.
Each day maintains the same movement categories but varies in:
Load
Speed
Exercise selection
This allows you to introduce:
Olympic lift variations
Plyometrics
Strength cycles (e.g., 3-week wave loading)
A well-structured 3-day plan blends:
Strength (squats, hinges)
Power (cleans, jumps)
Structural work (unilateral, posterior chain)
This is often the most effective setup for general performance and long-term progression.
4 Days Per Week: Upper/Lower Precision
At four days per week, training shifts from full-body to upper/lower splits, allowing more volume and focus.
Typical structure:
Monday: Upper
Tuesday: Lower
Thursday: Upper
Friday: Lower
This creates space for:
More targeted hypertrophy
Greater exercise variation
Better fatigue management
An alternative approach layers intent:
Upper Body trained like a power-bodybuilding system
Lower Body trained with athletic emphasis (speed, force, movement quality)
This is where programming becomes more individualized and performance-driven.
5 Days Per Week: Emphasis & Specialization
Five-day splits introduce bias:
Upper-dominant (3 upper / 2 lower)
Lower-dominant (3 lower / 2 upper)
This structure allows you to prioritize weak points or sport demands.
Key additions include:
Dedicated speed and power sessions
Rotational and acceleration work
More advanced loading strategies (clusters, wave loading)
At this level, training is no longer just about getting stronger—it’s about transferring strength into performance.
6 Days Per Week: High-Frequency Performance Training
This is a high-demand structure best suited for advanced athletes.
3 upper sessions
3 lower sessions
Each day has a clear focus:
Strength
Power
Plyometrics
Unilateral development
Volume is distributed carefully to avoid overload while maintaining high neural output.
If recovery, sleep, and nutrition aren’t aligned, this approach quickly becomes ineffective—so it has to be earned.
Making It Work
The mistake isn’t choosing the “wrong” split—it’s choosing one that doesn’t match your current capacity.
- 2–3 days: Build consistency and movement quality
- 4 days: Increase volume and structure
- 5–6 days: Add specialization and performance layers
The best programs don’t just look good on paper—they fit into real life and can be executed consistently.
Real World Examples
2 Days per Week
Week one: Workout A Monday, Workout B Thursday
Week two: Workout C Monday, Workout A Thursday
Full Body (Mon/Thu, Tue/Fri, or Wed/Sat)
| Category/Days | A | B | C |
|---|---|---|---|
| Squat | Front Squat | Bulgarian Squat | Back or Box Squat |
| Hinge | Romanian Deadlift | Trap Bar Deadlift | Good Morning |
| Upper Body Push | Bench Press | Military Press | Incline DB Triple Drop |
| Upper Body Pull | Bench Pull | Chins or Pulldowns | Incline DB Row |
OR
| Workout A | Workout B | Workout C |
|---|---|---|
| Power Clean | Power Snatch | Clean Pulls |
| Back Squat | Front Squat | Box Squat |
| Bench Press | Push Press | Incline Bench Press |
3 Days per Week
Full Body (Mon/Wed/Fri or Tue/Thu/Sat)
| Category/Days | Monday | Wednesday | Friday |
|---|---|---|---|
| Squat | Front Squat | Bulgarian Squat | Back or Box Squat |
| Hinge | Romanian Deadlift | Trap Bar Deadlift | Good Morning |
| Upper Body Push | Bench Press | Military Press | Incline DB Triple Drop |
| Upper Body Pull | Bench Pull | Chins or Pulldowns | Incline DB Row |
OR
| Monday | Wednesday | Friday |
|---|---|---|
| Power Clean with Thick Bar | Shoulder Press with Steel Log | Back Squat with Texas Power Bar |
| 3-week wave loading strength cycle | 3-week wave loading strength cycle | 3-week wave loading strength cycle |
| Push Press with Tsunami Bar | Front Squat with Safety Squat Bar | Power Snatch with Olympic Bar |
| 3-week basic strength cycle | 3-week basic strength cycle | 3-week basic strength cycle |
| Box Squat with Cambered Bar | Deadlift with Trap Bar | Shoulder Press with Swiss Bar |
| 3 week 4 x 6 cluster cycle | 3 week 4 x 6 cluster cycle | 3 week 4 x 6 cluster cycle |
OR
Full Body x 3 days per week
| Monday | Wednesday | Friday |
|---|---|---|
| 1: Banded Front Squat Wk1: Speed Strength >1.0m/s 4 x 6 @ 33% Band Wk2: Strength Speed >0.8m/s 4 x 4 @ 65% Band |
1: Belt Squat Wk1: 5 x 5 Wk2: 2 x 5, 3 x 3 |
1: Heavy Prowler Push Wk1: 4 x 20m Wk2: 5 x 20m |
| 2: Bulgarian Sprinter’s Squat Wk1: 4 x 6 Wk2: 4 x 4 |
2: Trap Bar Deadlift from Blocks Wk1: 5 x 5 Wk2: 2 x 5, 3 x 3 |
2: Clean Pulls Wk1: 5 x 5 Wk2: 2 x 5, 3 x 3 |
| 3: Banded Good Morning in Split Wk1: 4 x 6 Wk2: 4 x 4 |
3: Reverse Lunge into Hop Wk1: 4 x 6 Wk2: 4 x 4 |
3a: Iso Split Squat Wk1: 4 x 10 seconds Wk2: 4 x 6 seconds |
| 3b: Flywheel Split Squat Wk1: 4 x 6 Wk2: 4 x 4 |
||
| 4a: Swiss Bar Push Press Wk1: 5 x 5 Wk2: 2 x 5, 3 x 3 |
4a: Incline DB Bench Press Wk1: 4 x 6 Wk2: 4 x 4 |
a: Swiss Bar Bench Press Wk1: 5 x 5 Wk2: 2 x 5, 3 x 3 |
| 4b: Chin Ups Neutral Grip Wk1: 5 x 5 Wk2: 2 x 5, 3 x 3 |
4b: Gi Rotational Pulldown Wk1: 4 x 6 Wk2: 4 x 4 |
4b: Bench Pull Wk1: 5 x 5 Wk2: 2 x 5, 3 x 3 |
| CARE Circuit 2 sets | CARE Circuit 2 sets | CARE Circuit 2 sets |
| 5a: Hanging Leg Raise | 5a: Weighted Plank | 5a: Reverse Hypers |
| 5b: Single Leg Back Extension | 5b: Banded Face Pulls + Ext. Rotation | 5b: Banded Neck Series |
| 5c: Iso Neck Plank Series | 5c: Lateral Plank + Plate Push |
5c: Rollouts |
| d: Harop Curls | 5d: Copenhagen Planks | 5d: Side Plank + Thigh Abduction |
| 5e: Russian Twist | 5e: Chinese Back Plank | 5e: Banded Janda Sit Ups |
4 Days per Week
Upper / Lower Split
Mon: Upper
Tue: Lower
Thu: Upper
Fri: Lower
| Monday | Tuesday | Thursday | Friday |
|---|---|---|---|
| Front Squat | Bench Press | Back or Box Squat | Incline Bench Press |
| Trap Bar Deadlift | Bench Pull or Row | Romanian Deadlift | Seated Row |
| Bulgarian Squat | Military Press | Lunge | DB Shoulder Press |
| Reverse Lunge | Chins or Pulldowns | Harop Curl | DB Shrugs |
OR
Lower Body: Train like an Athlete
Upper Body: Train like a Power Body Builder
| Monday | Tuesday | Wednesday | Thursday | Friday | Saturday | Sunday |
|---|---|---|---|---|---|---|
| Upper Push & Pull |
OFF | Lower (Hinge) | Upper Push & Pull |
OFF | Lower (Squat) | OFF |
| Vertical Horizontal Diagonal |
Neural Mechanical Metabolic |
Horizontal Diagonal Vertical |
Neural Mechanical Metabolic |
|||
| Example | Example | Example | Example | |||
| 1a: Military Press 1b: Chin Ups 2a: Swiss Bar Medium Grip Bench Press 2b: Bent-over Row 3a: Triple Drop DB Incline Bench 3b: Incline DB Row (2 up, 1down) |
1: Power Clean 2: Trap Bar Deadlift 3: Banded Good Morning |
1a: Floor Press 1b: Pendlay Row 2a: Swiss Bar Incline Bench Press 2b: Half Kneeling Single Arm Pulldown 3a: KB Single Arm Savickas Press 3b: Seated KB Shrugs |
1: Band Box Squat 2: KB Slant Board Cyclist Squat 3: Belt Squat |
5 Days per Week
Split emphasis:
Upper-body dominant (3 upper / 2 lower)
Lower-body dominant (3 lower / 2 upper)
Upper Body
| Sets & Reps | Monday | Wednesday | Friday |
|---|---|---|---|
| Wk1: 5 x 10 Wk2: 5 x 5 Wk3: 5 x 8 |
Horizontal Push – Swiss Bar Bench Press Horizontal Pull - Bench Pull |
Diagonal Push – Incline Bench Press (Swiss Bar option) Diagonal Pull – Yates Row |
Vertical Push – Military Press (Swiss Bar option) Vertical Pull – Chin Ups Neutral Grip |
| Wk1: 12, 10, 8, 8 Wk2: 10, 8, 6, 6 Wk3: 12, 10, 8, 8 |
Diagonal Push – Incline DB Bench Press (Triple Drop option) Diagonal Pull – Incline DB Row (2 up, 1 down option) |
Vertical Push – Seated DB Shoulder Press Vertical Pull – Seated DB Shrugs |
Horizontal Push – DB Low Incline DB Press Horizontal Pull – Low Cable Seated Row |
| Wk1: 3 x 12 Wk2: 3 x 10 Wk3: 3 x 8 |
Vertical Push – KB Single Arm Savickas “Z” Press Vertical Pull – One Arm Landmine Shrug |
Horizontal Push – Seated Bench Press Horizontal Pull – Landmine Kroc Row |
Diagonal Push – ½ Kneeling Landmine Press Diagonal Pull – ½ Kneeling One Arm Pulldown |
| Wk1: 2 x 15, wk2: 2 x 12, wk3: 2 x 10, wk4: 2 x 8 | Upper Body CARE | Upper Body CARE | Upper Body CARE |
| As Required | Armour Plating | Armour Plating | Armour Plating |
Lower Body Performance Activation: KB Swings into Long Jumps, Skipping, Pogos, 5m accelerations
| Tuesday | Saturday |
|---|---|
| Speed Complex | Rotational Complex |
| 1a: First Step Prowler Drive | 1a: Single Arm Rotational Landmine Hang Power Clean to Press |
| 1b: Band Resisted 5 – 10 meter sprint | 1b: Rotational Bounds |
| 1c: Repeat Broad Jumps | 1c: Full Body Landmine Twist or Gi Rotational Pulldown |
| 1d: Band-assisted 5 – 10 meter sprint | 1d: Standing Rotational MB Throw to Wall |
| Bilateral Hip (4) | Bilateral Knee (4) |
| 1a: Trap Bar Deadlift (Blocks) | 1a: Pin Squats |
| 1b: Repeat Hurdle Jumps | 1b: Box Jumps |
| 1c: Power Clean (Blocks, Hang) or Clean Pulls | 1c: Band Box Squat |
| 1d: Bounding | 1d: Depth Jumps |
| Unilateral Knee (3) | Unilateral Hip (3) |
| 1a: Bulgarian Sprinter’s Squat | 1a: Heavy Prowler Push |
| 1b: Borzov Hops | 1b: Reverse Lunge into Hop |
| 1c: Banded Low Box Step Ups | 1c: Banded Good Morning in Split |
| Contraction Variation (2) | Contraction Variation (2) |
| 1a: Isometric Mid-Thigh Pull | 1a: Iso Split Squat |
| 1b: Flywheel Romanian Deadlift | 1d: Flywheel Split Squat |
| LB CARE | LB CARE |
OR
Lower Body (FCM - Wk1: 4 x 6, wk2: 4 x 4, wk3: 4 x 2) (Isolateral – Wk1: 12, 10, 8, wk2: 10, 8, 6, wk3: 8, 6, 4)
| Monday (LB1) | Wednesday (LB2) | Friday (LB3) |
|---|---|---|
| 1a: Squat Variation Back Squat |
1a: Olympic Variation Power Clean from the floor |
1a: Hinge Variation Trap Bar Deadlift |
| 1b: Plyometrics Wk1: Band Assisted Vertical Jumps Wk2: Tuck Jumps Wk3: Seated Box Jumps |
1b: Plyometrics Wk1: Band Assisted Long Jumps Wk2: Repeat Long Jumps Wk3: Repeat Hurdle Jumps |
1b: Plyometrics Wk1: Repeat Hops for Distance Wk2: Repeat Hurdle Hops Wk3: Knees to One Foot |
| 1c: Olympic variation Wk1: Power Snatch from Floor Wk2: Power Snatch from Hang Wk3: Split Power Snatch |
1c: Prowler March (20m) Wk1: BW Wk2: 1.5 x BW Wk3: 2 x BW |
1c: Band Box Squat Wk1: 40% Bar/33% Band Wk2: 50% Bar/33% Band Wk3: 60% Bar/33% Band |
| 1d: Plyometrics/MB/Jumps Wk1: Med Ball Scoop Toss Wk2: Forward Med Ball Throws Wk3: Depth Jumps + Long Jump |
1d: Plyometrics/Med Ball/Jumps Wk1: Knee to Feet Jumps Wk2: Kneeling Clean Wk3: Kneeling Snatch |
1d: Plyometrics/Med Ball/Jumps Wk1: Borzov Hops Wk2: Single Leg Box Jumps Wk3: Single Leg Depth Jump |
| 2a: Walking Lunges | 2a: Step Ups | 2a: Bulgarian Sprinter’s Squat |
| 2b: Single Leg Hip Thrust | 2b: Reverse Lunge | 2b: Single Leg Romanian Deadlift |
| LB CARE | LB CARE | LB CARE |
Upper Body
| Sets & Reps | Session 1 | Session 2 | Session 3 |
|---|---|---|---|
| Wk1: 5 x 10 Wk2: 5 x 5 Wk3: 5 x 8 |
Horizontal Push – Swiss Bar Bench Press Horizontal Pull - Bench Pull |
Diagonal Push – Incline Bench Press (Swiss Bar option) Diagonal Pull – Yates Row |
Vertical Push – Military Press (Swiss Bar option) Vertical Pull – Chin Ups Neutral Grip |
| Wk1: 12, 10, 8, 8 Wk2: 10, 8, 6, 6 Wk3: 12, 10, 8, 8 |
Diagonal Push – Incline DB Bench Press (Triple Drop option) Diagonal Pull – Incline DB Row (2 up, 1 down option) |
Vertical Push – Seated DB Shoulder Press Vertical Pull – Seated DB Shrugs |
Horizontal Push – DB Low Incline DB Press Horizontal Pull – Low Cable Seated Row |
| Wk1: 3 x 12 Wk2: 3 x 10 Wk3: 3 x 8 |
Vertical Push – KB Single Arm Savickas “Z” Press Vertical Pull – One Arm Landmine Shrug |
Horizontal Push – Seated Bench Press Horizontal Pull – Landmine Kroc Row |
Diagonal Push – ½ Kneeling Landmine Press Diagonal Pull – ½ Kneeling One Arm Pulldown |
| Wk1: 2 x 15, wk2: 2 x 12, wk3: 2 x 10, wk4: 2 x 8 | Upper Body CARE | Upper Body CARE | Upper Body CARE |
| Armour Plating | Armour Plating | Armour Plating |
Week One: Session1 on Tuesday & Session 2 on Saturday
Week Two: Session 3 on Tuesday & Session 1 on Saturday
Week Three: Session 2 on Tuesday & Session 3 on Saturday
6 Days per Week
High-frequency split:
3 Upper / 3 Lower days
| Monday (LB1) |
Tuesday (UB1) |
Wednesday (LB2) |
Thursday (UB2) | Friday (LB3) | Saturday (UB3) |
|---|---|---|---|---|---|
| 1a: Squat Variation Back Squat |
Horizontal Push – Swiss Bar Bench Press Horizontal Pull - Bench Pull |
1a: Olympic Variation Power Clean from the floor |
Diagonal Push – Incline Bench Press (Swiss Bar option) Diagonal Pull – Yates Row |
1a: Hinge Variation Trap Bar Deadlift |
Vertical Push – Military Press (Swiss Bar option) Vertical Pull – Chin Ups Neutral Grip |
| 1b: Plyometrics Wk1: Band Assisted Vertical Jumps Wk2: Tuck Jumps Wk3: Seated Box Jumps |
1b: Plyometrics Wk1: Band Assisted Long Jumps Wk2: Repeat Long Jumps Wk3: Repeat Hurdle Jumps |
1b: Plyometrics Wk1: Repeat Hops Wk2: Repeat Hurdle Hops Wk3: Knees to One Foot |
|||
| 1c: Olympic variation Wk1: Power Snatch from Floor Wk2: Power Snatch from Hang Wk3: Split Power Snatch |
Diagonal Push – Incline DB Bench Press (Triple Drop option) Diagonal Pull – Incline DB Row (2 up, 1 down option) |
1c: Prowler March (20m) Wk1: BW Wk2: 1.5 x BW Wk3: 2 x BW |
Vertical Push – Seated DB Shoulder Press Vertical Pull – Seated DB Shrugs |
1c: Band Box Squat Wk1: 40% Bar/33% Band Wk2: 50% Bar/33% Band Wk3: 60% Bar/33% Band |
Horizontal Push – DB Low Incline DB Press Horizontal Pull – Low Cable Seated Row |
| 1d: Plyometrics/MB/Jumps Wk1: Med Ball Scoop Toss Wk2: Forward Med Ball Throws Wk3: Depth Jumps + Long Jump |
1d: Plyometrics/MB/Jumps Wk1: Knee to Feet Jumps Wk2: Knee to Feet to Vert. Wk3: Knee to Feet to Box |
1d: Plyometrics/MB/Jumps Wk1: Borzov Hops Wk2: Single-leg Box Jumps Wk3: Single-leg Depth Jump |
|||
| Vertical Push – KB Single Arm Savickas “Z” Press Vertical Pull – One Arm Landmine Shrug |
Horizontal Push – Seated Bench Press Horizontal Pull – Landmine Kroc Row |
Diagonal Push – ½ Kneeling Landmine Press Diagonal Pull – ½ Kneeling One Arm Pulldown |
|||
| 2a: Walking Lunges 2b: Single Leg Hip Thrust |
2a: Step Ups 2b: Reverse Lunge |
2a: Sprinter’s Squat 2b: Single Leg RDL |
|||
| LB CARE | UB CARE | LB CARE | UB CARE | LB CARE | UB CARE |
Step Three: Sets & Reps, How to Progress with Purpose
Once movement patterns are established, the next step is to apply the appropriate training stimulus. Sets and reps aren’t random—they’re tools. Used correctly, they guide adaptation from initial coordination through advanced strength and power.
The key is progression across weeks, not just within a single workout.
Phase 1: Foundation & Movement Quality
At the entry level, the goal is simple: build control, reinforce technique, and prepare the Body for heavier loading.
2 sets per exercise
Week 1: 12–15 reps
Week 2: 10–12 reps
Week 3: 8–10 reps
This gradual reduction in reps introduces load without sacrificing movement quality. It’s not about fatigue—it’s about consistency and clean execution.
Phase 2: Hypertrophy & Structural Balance
Once a base is established, volume increases, and intensity becomes more varied. This is where muscle development and unilateral control come into play.
3 sets per exercise, with varied methods:
Straight sets (e.g., 3 × 8–12)
Ascending or descending reps (12, 10, 8)
Contrast styles (e.g., 6, 12, 25)
Intro strength work (3 × 5)
Progression across weeks introduces intensity techniques:
Moving toward failure
Drop sets
Cluster or “ratchet” sets
The goal here is adaptation through variation—challenging the Body without losing structure.
Phase 3: Strength & Power Development
With a solid base in place, training shifts toward force production and neural efficiency.
4 sets per exercise
Rep schemes tighten:
Week 1: Moderate loads (e.g., 4 × 6)
Week 2: Heavier (e.g., 4 × 4)
Week 3: Low-rep strength (e.g., 4 × 2)
Advanced methods are introduced:
Cluster sets (breaking reps into smaller segments)
Power-focused work (explosive intent)
Alternating strength and hypertrophy days
This phase demands intent—every rep should be deliberate and controlled.
Phase 4: Advanced Strength & Intensification
For experienced lifters, higher set volumes and more aggressive loading strategies come into play.
5 sets per exercise
Classic strength: 5 × 5
Intensification: 5 × 3 → 5 × 1
Hypertrophy support: 5 × 6–10
Progression becomes more aggressive, but also more precise. Fatigue management is critical here.
Phase 5: Wave Loading & Peak Strength
This is where programming becomes highly strategic. Wave loading allows you to push intensity while managing fatigue across sessions.
Examples include:
Strength waves: (6, 5, 4) → (5, 4, 3) → (4, 3, 2)
Hypertrophy waves: (12, 10, 8) → (10, 8, 6) → (8, 6, 4)
Cluster waves: breaking heavy sets into mini-sets (e.g., 4+4, 3+3, 2+2)
This phase is less about volume and more about precision, intensity, and timing.
Bringing It All Together
The mistake most people make is jumping straight into advanced methods. In reality, each phase builds on the last:
- Start with control
- Add volume
- Increase intensity
- Then specialize
Progression isn’t just about lifting heavier—it’s about applying the right stimulus at the right time.
| Number of Sets | Training Types | Week 1 | Week 2 | Week 3 |
|---|---|---|---|---|
| 2 | CARE & Intro Strength | 2 x 12 - 15 | 2 x 10 - 12 | 2 x 8 - 10 |
| 3 | Hypertrophy & Unilateral Hypertrophy (1) Hypertrophy (2) Size & Strength & Unilateral Strength |
3 x 12 3 x 6, 12, 25 3 x 8 Straight 12, 10, 8 3 x 5 |
3 x 10 3 x 8-12 to fail 3 x 3/5 Ratchet 10, 8, 6 3 x 3 |
3 x 8 3 x Drop Sets 3 x 4+4 Cluster 8, 6, 4 3, 2, 1 |
| 4 | Strength & Power Strength & Power Strength & Power Clusters (1) Strength & Power Clusters (2) Hypertrophy & Unilateral (1) Hypertrophy & Unilateral (2) |
4 x 6 6, 5, 4, 4 4 x 3 + 3 4 x 3 + 3 12, 10, 8, 8 4 x 12 |
4 x 4 5, 4, 3, 3 4 x 2 + 2 4 x 2+2+2 10, 8, 6, 6 4 x 10 |
4 x 2 4, 3, 2, 2 4 x 1 + 1 4x1+1+1+1+1+1 8, 6, 4, 4 4 x 8 |
| 5 | Strength & Power (1) Strength & Power (2) Advanced Strength Hypertrophy |
5 x 5 5 x 5 5 x 5 5 x 10 |
2 x 5, 3 x 3 4 x 4 5 x 3 5 x 8 |
5 x 2 or 5,4,3,2,1 3 x 3 5 x 1 or 2 5 x 6 |
| 6 | Strength Wave Loading (1) Strength Wave Loading (2) Hypertrophy Wave Loading Wave Load Strength Clusters Advanced Strength |
2 x (6, 5, 4) 2 x (7, 5, 3) 2 x (12, 10, 8) 2 x (4+4, 3+3, 2+2) 6 x 6 |
2 x (5, 4, 3) 2 x (6, 4, 2) 2 x (10, 8, 6) 2 x (3+3, 2+2, 1+1) 6 x 3 |
2 x (4, 3, 2) 2 x (5, 3, 1) 2 x (8, 6, 4) 2 x (1+1+1, 1+1, 1) 6 x 4 |
Recommended Elitefts Tools for These Progressions
Use the movement pattern first, then choose the tool that lets you train it harder, safer, or with more variation.
SS Yoke Bar
Squat, good morning, lunge, and shoulder-friendly lower-body work.
Shop SS Yoke BarRackable Trap Bar
Hinges, pulls, carries, shrugs, and loaded carries in a rack-friendly footprint.
Shop Rackable Trap BarE-Series Prowler®
Conditioning, accelerations, heavy pushes, and lower-body finishers.
Shop E-Series Prowler®American Thin Press Neutral Grip Bar
Pressing and rowing variety with more joint-friendly grip options.
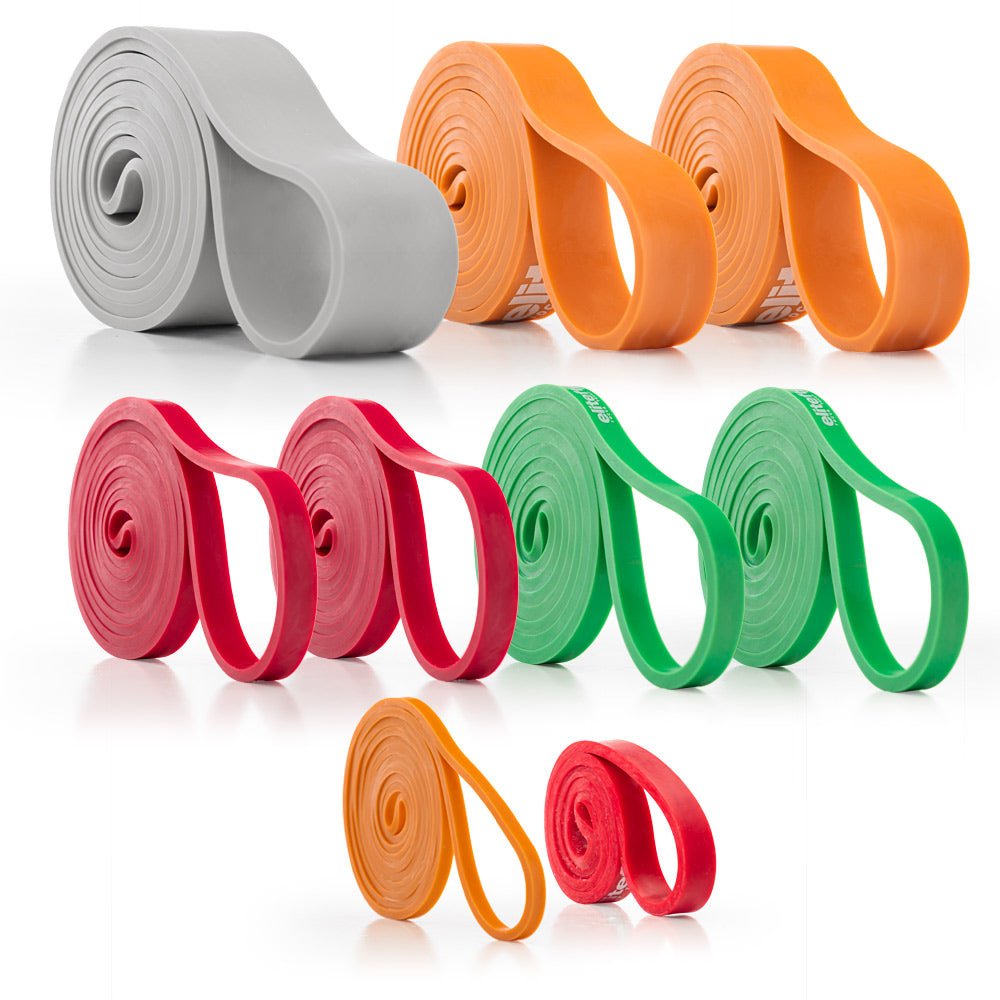
Shop American Thin Press Neutral Grip Barelitefts Pro Mini Resistance Band
Warm-ups, speed work, activation, assistance, and CARE circuits.
Shop Elitefts Pro Mini Resistance BandDo not chase the perfect program. Build the repeatable one. Select the right movements, match them to the week you actually live, then progress with purpose. That is how training stays simple, hard, and effective.
Ashley Jones is a strength & conditioning coach with 30+ years in professional sport across seven countries, best known for his work in rugby from club to international levels—including two Rugby World Cups with teams from both hemispheres. He was named NSCA Professional Coach of the Year (2016) and received the NSCA Boyd Epley Lifetime Achievement Award (2023). He’s also a long-time Elitefts columnist.