

Mastering the Squat Setup: Why Your Walkout Is Ruining Your Lift—and How to Fix It
Most missed squats are not lost in the hole. They are lost before the bar ever leaves the rack. Grip, upper-back tension, torso position, and a patient walkout can make a heavy bar feel controlled instead of chaotic.
Big idea: You cannot fix a bad setup after the walkout. Create the position first, let the bar settle, then squat from a place of control.
When lifters approach the squat rack, most of their attention goes to the lift itself: how fast to descend, what cue to think about in the hole, or how to grind through the sticking point. Those details matter, but they are downstream from the setup.
According to Purcellus Williams—an elite 74 kg and 83 kg competitive powerlifter and full-time coach—the setup is one of the most important parts of the squat. How you take your grip, wedge under the bar, brace, unrack, and walk out determines how the weight feels on your back and how much force you can express once the squat actually starts.
Dial in the setup, and the bar feels stable. Rush it, and the same weight can feel like it is folding you in half.
Establish the Grip That Lets You Build a Shelf
There is no universal “best” squat grip width. Some lifters thrive with a close grip. Others need to set their hands wider because of shoulder mobility, torso size, or upper-back structure.
A solid starting point is shoulder-width. From there, adjust based on what lets you get under the bar, create a stable shelf, and maintain position through the whole set. A practical marker is placing the end of your thumb near the point where the bar’s knurling meets the smooth center, then adjusting outward as needed.
What to avoid
Do not force your hands as close as possible just because it feels “tight.” That can create fake tension: discomfort without a better structure.
What to do instead
Push the bar forward into the rack, apply pressure with your palms, keep your fingers relaxed at first, and slide into position before you fully clamp down.
Mobilize Under the Bar, Then Lock the Upper Back
The barbell needs a shelf. If your upper back is passive, the bar has no stable platform, and your torso is more likely to collapse under heavy loads.
As you get under the bar, actively retract your scapulae and squeeze your upper back into the bar. Once you are wedged in, tighten your grip hard. This sequence matters: palm pressure first, position second, full grip tension third.
Before the full unrack, use a brief false unrack: pop the bar up slightly to check whether it feels centered. Nobody is perfectly symmetrical. This gives you a chance to correct the bar position before the lift gets real.
Stack Your Torso Before You Unrack
One of the biggest setup errors happens right before the bar leaves the hooks. In a low-bar squat, the spine will naturally be more extended. The problem is when the lifter unracks while overextended, with the hips sitting too far behind the torso.
If you start in that position, you can run out of space before you reach depth. The hips and low back are already loaded into a restricted position, and the squat turns into a fight before the descent begins.
The fix is to walk your hips under your torso before unracking. When your upper back is tight and your hips are stacked, the bar should feel like it wants to pop out of the rack.
Before the unrack: exhale hard, pull the ribs down, stack the torso, then stand up with the bar.
This exhale is not the main brace for the squat. It is a positioning tool. It helps create core tension and puts the torso in a better place before you take your full breath and brace after the walkout.
The Walkout Mistake That Kills Heavy Squats
After you unrack, do not immediately start moving your feet. Light weights let you get away with it. Max-effort weights do not.
As the load gets heavier, the bar can whip and shift. If you move while the weight is still bobbling, you can lose the upper-back tension, stacked torso, and balance you just worked to create.
Unrack. Let the weight settle. Then walk out.
Keep the walkout simple: one step, two steps, then a third step or small adjustment to settle. A little foot correction is fine. A long pitter-patter walkout wastes energy and invites instability.
| Step | What to Do | Why It Matters |
|---|---|---|
| 1. Wedge | Grip, palm pressure, upper-back tension. | Creates a stable shelf for the bar. |
| 2. Stack | Walk hips under torso and exhale hard. | Prevents overextension before the unrack. |
| 3. Unrack | Stand tall without rushing backward. | Keeps the brace and bar position intact. |
| 4. Settle | Pause long enough for the bar to stop moving. | Reduces wasted movement and balance loss. |
| 5. Walk | Use the fewest steps needed to set your stance. | Saves energy for the actual squat. |
Root the Feet: Heel, Pinky Toe, Big Toe
Once the weight is walked out, finish the setup from the floor up. Because you stacked correctly, especially as a low-bar squatter, you should already feel pressure through the heel. Next, grab the floor with the outside of the foot and pinky toe.
Then drive the big toe into the floor. That big-toe pressure helps create quad tension and allows the knee to track naturally over the toes.
- Heel: anchors the foot and keeps the lifter balanced.
- Pinky toe: helps create lateral pressure and floor grip.
- Big toe: reinforces quad tension and knee tracking.
Brace, Break, and Push the Floor Away
Now take your full breath and brace into your core. If you wear a belt, this is where you should feel pressure expand into it.
As you start the descent, aim for the knees and hips to break together. Let the knees track over the toes while the hips move with them. This helps keep the bar over the midfoot and creates a more stable position at the bottom.
Think of the descent as loading a spring. You are not just dropping down—you are pushing into the floor. Once you hit depth, keep that same intent and push the floor away.
The Two Extremes That Wreck Squat Position
| Error | What Happens | Better Cue |
|---|---|---|
| Pre-hinging | The hips shoot back first, the torso folds, and the squat turns into a good morning. | Stay stacked and let the knees and hips break together. |
| Forcing upright posture | The lifter overextends, the bar drifts, and the body dumps forward to find midfoot. | Allow natural forward lean while keeping pressure through the full foot. |
The goal is not to sit back as far as possible or stay perfectly vertical. The goal is to stay stacked, keep the bar over midfoot, feel the quads, and maintain tension from setup to lockout.
Elitefts Gear for a Stronger Squat Setup
These suggestions match the problems covered in this article: bar security, bracing, knee support, walkout confidence, and supplemental squat training.
elitefts Aggressive Power Bar
A power bar with aggressive knurling and center knurling for secure bar placement during squats, bench, and deadlifts.
Shop Power BarElitefts Premium 13mm P2 Lever Belt
A heavy-duty lever belt built for serious support when you need consistent bracing under maximal loads.
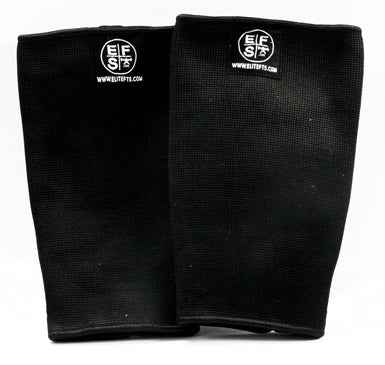
Shop Lever BeltElitefts WarGrip Training Knee Sleeves
Training-focused sleeves designed for joint warmth, support, and easy on/off use with pull tabs.
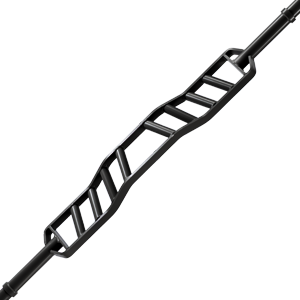
Shop Knee SleevesRackable Cambered Squat Bar
A specialty bar option for building stability, changing the squat stimulus, and reducing shoulder strain.
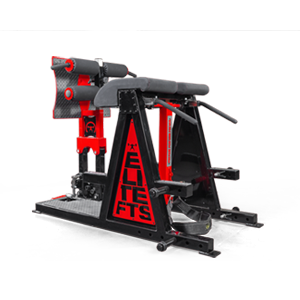
Shop Cambered BarElitefts Belt Squat Machine
Build lower-body strength with less spinal compression—useful for extra volume, rehab phases, and hard leg training.
Shop Belt SquatElitefts Monolift
A serious squat station built for heavy training and competition-style setup work.
Shop MonoliftNeed more options? Browse belts, knee sleeves, bars and collars, and monolifts.
Quick Coaching FAQ
Should I squeeze the bar as hard as possible before getting under it?
No. Start with palm pressure and relaxed fingers so you can mobilize under the bar. Once you are wedged into position, then tighten your grip hard.
How long should I wait after unracking?
Long enough for the bar to stop moving. It may only be a second, but that second matters when the load is near your max.
What should I think about during the actual squat?
Keep it simple: root the feet, brace, push into the floor on the way down, and push the floor away on the way up.
Listen...
You cannot fix a bad setup once you have walked the weight out. With an empty bar, you can re-stack and adjust. With 300, 400, 500 pounds or more on your back, that becomes a much harder problem.
Set the grip. Build the shelf. Stack before you unrack. Let the bar settle. Walk out with purpose. Root your feet. Brace hard. Then squat.
Live. Learn. Pass On.